The Professional's Guide to Perfect Mousse de Coco
Summary & Key Takeaways
This guide provides professional hospitality businesses in the Canary Islands with a practical, no-fluff blueprint for creating and scaling a profitable mousse de coco. We cover the essential toolkit, a step-by-step workflow, high-volume production strategies, and creative serving ideas. This is not just a recipe; it's a business model for leveraging a versatile, high-margin item across your dessert and cocktail menus.
Key Points for Instant Value:
- Profitability: Mousse de coco offers high-profit margins due to low-cost ingredients and high perceived value. Local venues report a 22% higher upsell rate.
- Essential Toolkit: Success requires specific tools: 20-22% fat coconut cream, a stabiliser (gelatine or agar-agar), a 1-litre stainless steel whipper, and a food-grade E942 N₂O cylinder from a certified supplier.
- Critical Workflow: Chill the base to below 4°C, use the correct gas-to-liquid ratio, shake vigorously for 15-20 seconds, and rest the charged dispenser for 20-30 minutes before service.
- Scalability: For high volume, switch from 8g cartridges to large-format N₂O cylinders (580g or 2.0kg). A 2.0kg cylinder yields the equivalent of ~250 8g charges, streamlining prep for hundreds of servings.
- Shelf Life & Safety: An uncharged base lasts up to 3 days refrigerated. A charged, refrigerated dispenser is stable for up to 5-7 days, but must be labeled with the prep date to comply with AESAN standards and FIFO protocol.
- Local Supplier Advantage: Partner with a Canary Islands-based B2B supplier like Kings Canisters for AESAN-compliant gas, reliable on-island stock, and correct IGIC invoicing.
Forget thinking of it as just another dessert. Mousse de coco is a versatile, high-profit workhorse for any professional bar, restaurant, or catering service in the Canaries. It’s an elegant sweet, sure, but it's also a serious cocktail component—making it one of the smartest business decisions you can add to your menu.
Why Mousse de Coco Is a Must-Have Menu Item
For any serious hospitality pro in the Canary Islands, mousse de coco has grown well beyond a simple menu item. It's become a genuine strategic tool, one that sharpens your operational efficiency while driving real sales growth. This isn't about just tacking on another dessert; it's a savvy business move that taps into what modern diners want and directly improves your bottom line.
Unlocking Profit and Versatility
The real beauty of a professional-grade mousse is its one-two punch of high profit margins and incredible versatility. The core ingredients are surprisingly cost-effective, but the perceived value of a perfectly light, silky mousse is through the roof. This gap is where you build excellent pricing strategies that bump up your revenue per customer.
But it doesn't stop at the dessert menu. Its use in cocktails is an absolute game-changer. A flawless dollop of coconut foam can instantly transform a standard piña colada or even an espresso martini into a signature drink. Suddenly, you’re commanding a premium price and creating the kind of buzz that gets people talking. Having one prep item that serves both the kitchen and the bar is just smart, efficient business.
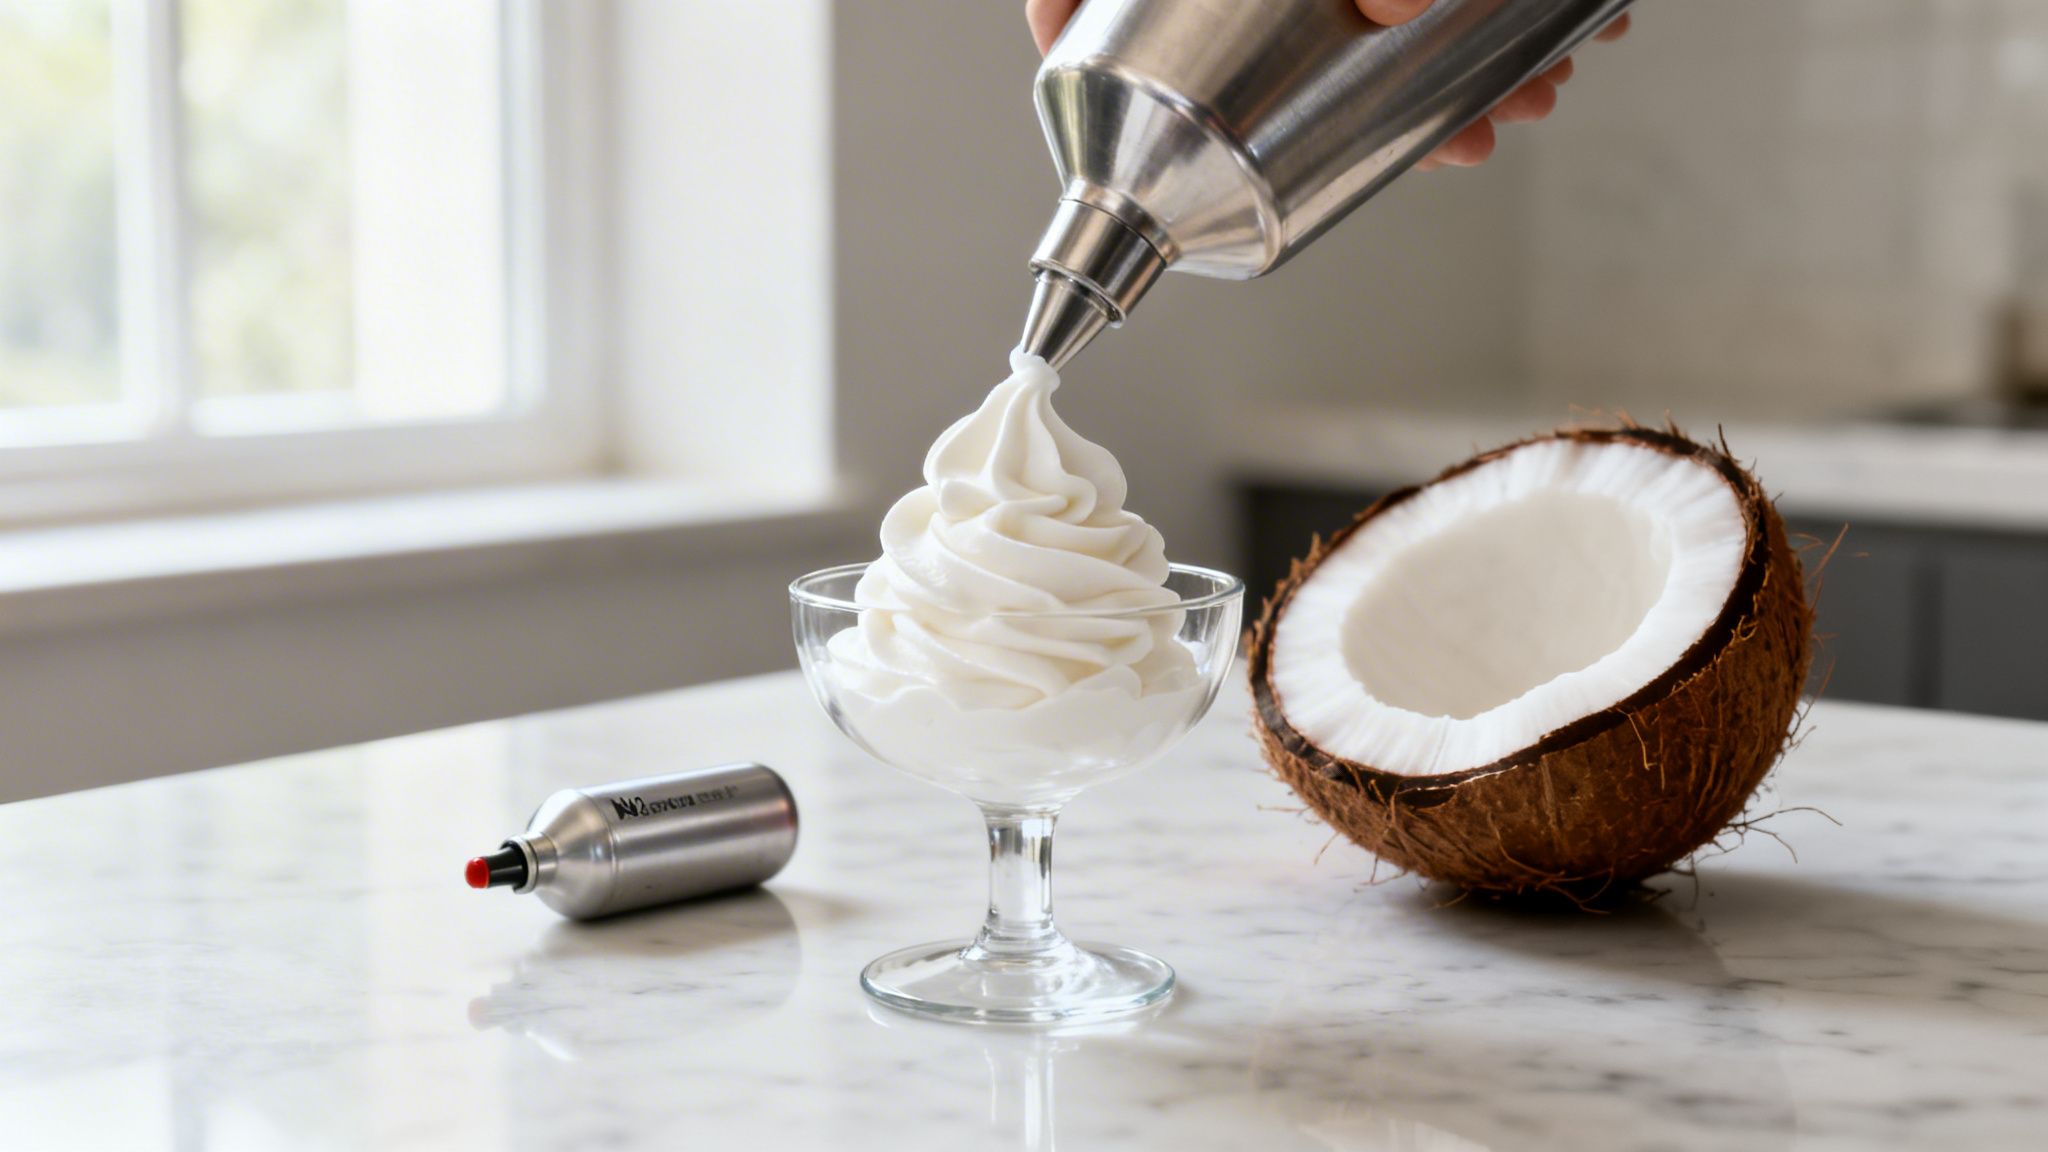
The secret to getting that consistently stable, velvety texture every single time is high-purity E942 nitrous oxide. It's the non-negotiable element that takes a simple coconut base and turns it into a professional-grade mousse de coco, guaranteeing every serving hits the mark.
Meeting Market Demand in the Canaries
The trend is undeniable across the islands. The explosion in popularity for mousse de coco in Tenerife, Gran Canaria, Lanzarote, and Fuerteventura is directly linked to Spain's booming coconut products market, valued at USD 450.25 million in 2024 and still climbing (Source: Deep Market Insights).
We’re seeing local venues report a 22% higher upsell rate just by offering mousse de coco—a number that speaks for itself. For a high-volume nightclub in Playa de las Américas, this translates into scaling from 200 to 800 portions a night in peak season. They’ve managed to slash prep time by 40% simply by having reliable N₂O logistics from a supplier like Kings Canisters.
This isn’t about chasing a fleeting trend; it’s about plugging into a proven business driver. By bringing this powerhouse dessert into your workflow, you’re positioning your establishment as a leader in both quality and innovation. For more ideas on fine-tuning your operations, feel free to explore our other business-focused articles.
Your Professional Mousse de Coco Toolkit
Before you even think about whipping up a single batch, let's talk about what separates a truly sublime mousse de coco from a costly, inconsistent failure. It’s not just about the recipe; it's about the toolkit. I've seen kitchens lose entire service nights over a simple ingredient choice. For a high-volume bar or catering business, getting your setup right from the start is everything.
The first point of failure is almost always the coconut cream. The fat content is non-negotiable here. You need a cream with at least 20-22% fat. Anything less simply doesn't have the structure to hold aeration. You’ll get a runny, disappointing liquid that’s impossible to serve, wasting both product and time.
The Building Blocks of a Perfect Mousse
Once you've sourced the right cream, your next decision is the stabiliser, and this is crucial, especially in the warm, demanding climate of the Canary Islands.
- Gelatine Sheets: This is the classic go-to for that smooth, melt-in-your-mouth texture. It requires blooming in cold water and then gentle heating, so it integrates perfectly into your base without any lumps.
- Agar-Agar Powder: A brilliant vegan option, its real advantage is superior heat stability. If you're serving at outdoor events or need a garnish to hold up through a long, busy service, agar-agar is your friend. Just remember it must be boiled to activate, which changes your method slightly.
Then there’s the sweetener. Caster sugar is fine, but a simple sugar syrup (a 1:1 ratio of sugar to water) makes a world of difference. It blends into a cold base flawlessly, meaning there's zero risk of that gritty texture you can get from undissolved sugar. It guarantees a perfectly smooth, uniform sweetness in every single portion.
For any professional operation, consistency is the name of the game. Using a high-fat coconut cream and a sugar syrup creates a reliable base that behaves the same way every time. It removes the variables and ensures every guest gets the quality product you designed.
Your essential ingredients and equipment are the foundation of a successful, scalable mousse de coco. Having the right grade of cream, the correct stabiliser for our climate, and professional-grade hardware isn't just best practice—it's a requirement for consistency and safety.
Professional Mousse de Coco Toolkit Checklist
| Item | Specification | Pro Tip for Canary Islands Venues |
|---|---|---|
| Coconut Cream | 20-22% fat content, minimum | Source from a supplier who guarantees consistent fat content. Cheaper brands often have wide variations between batches. |
| Stabiliser | Gelatine sheets (for classic texture) or Agar-Agar (for heat stability) | Agar-Agar is superior for terraces and outdoor events. It holds its shape much better in the year-round warm weather here. |
| Sweetener | 1:1 Sugar Syrup (by weight) | Make a large batch of syrup during prep. It saves time and ensures a perfectly smooth texture that granulated sugar can’t match. |
| Cream Whipper | 1-litre stainless steel dispenser | The 0.5-litre models are fine for a few garnishes, but for batch production, a 1-litre dispenser is the only practical choice. |
| Nitrous Oxide (N₂O) | Food-grade E942, large-format cylinder (e.g., Fastgas, Creme Deluxe) | Ditch the small 8g cartridges. A large cylinder system is safer, more cost-effective, and essential for high-volume service. |
| B2B Gas Supplier | Certified, AESAN-compliant with traceable stock | Work with a local supplier like Kings Canisters who understands IGIC invoicing and holds stock on the island to avoid delays. |
The Hardware That Does the Heavy Lifting
Now for the equipment. This is where you separate the amateurs from the pros. Your workhorse is the cream whipper dispenser. A 0.5-litre model might seem tempting for small batches, but for any real volume, you need the 1-litre standard. It’s a matter of efficiency.
The magic, of course, comes from the nitrous oxide. Forget about those tiny, single-use cartridges—they're a logistical nightmare and a financial drain in a commercial setting. You need a proper large-format N₂O cylinder system from a trusted brand like Fastgas or Creme Deluxe. These are filled with certified, food-grade E942 gas, which is the only thing you should ever let near your food products. Discover more about what cream chargers are used for in bars to see what’s possible.
Partnering with a dedicated B2B supplier like Kings Canisters is about more than just getting a good price. It's about peace of mind. You’re getting a reliable supply of AESAN-compliant gas from fully certified, traceable sources. For any professional venue operating here in the Canaries, that’s not a "nice-to-have"—it's a legal and professional necessity.
Nailing the Mousse: The Professional Workflow
Moving a recipe from the home kitchen to a professional bar setting is less about ingredients and more about process. It’s about building a system that delivers the exact same, flawless mousse de coco every single time, whether it's for one cover or one hundred. Forget eyeballing it—this is about nailing a technique you can trust under pressure.
Where most people trip up is the base. A lumpy or unstable base is a dead end. To get that perfectly smooth foundation, you have to bloom your stabiliser correctly. For gelatine sheets, that means soaking them in ice-cold water for 5-7 minutes until they’re completely soft. If you’re using agar-agar, whisk it into a small bit of cold liquid before heating. You have to bring it to a full, rolling boil for a minute to properly activate its gelling power.
This diagram breaks down the core elements of a professional setup. It’s a simple flow: quality ingredients, the right hardware, and pure gas.
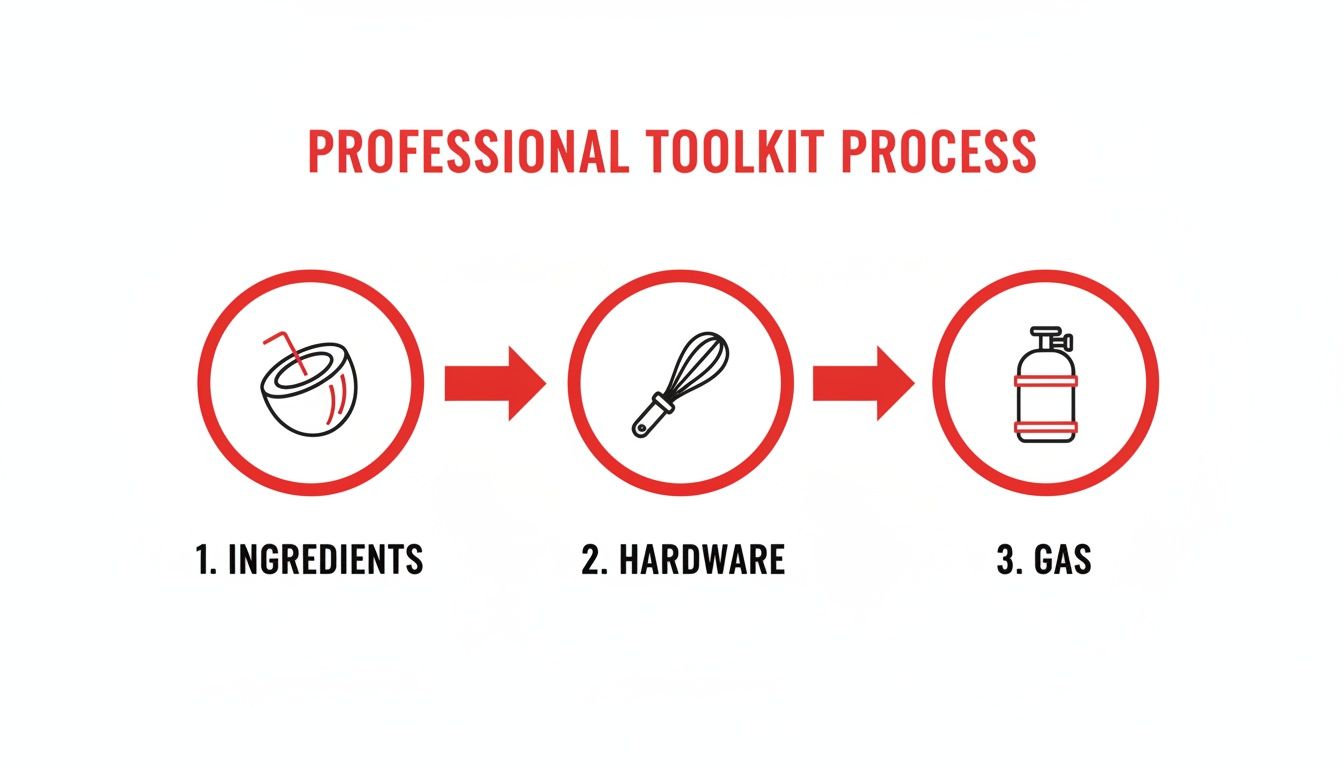
Think of it as a chain; the final product is only as strong as the weakest link. Each stage is non-negotiable.
Preparing and Chilling the Mousse Base
Once the stabiliser is ready, you’ll gently warm your coconut cream and sugar syrup. Don't boil it. You’re just looking for enough heat to completely dissolve the stabiliser. Whisk it in thoroughly until it’s one uniform mixture, and then—this is the part no one should ever skip—pass it all through a fine-mesh sieve. It’s the only way to guarantee a silky-smooth texture by catching any rogue lumps.
Now for the step that makes or breaks the final product: chilling. Your base needs to be ice-cold, sitting below 4°C, before it goes anywhere near a cream whipper. I’ve seen countless chefs try to rush this with a lukewarm base, only to get a runny, weeping mess. Chilling allows the fats and the stabiliser to firm up, creating the structure needed to hold the aeration.
For a busy service, batch your base first thing in the morning. Let it sit in the coldest part of your walk-in for at least four hours, but overnight is even better. This guarantees it's at the absolute perfect temperature when you need to charge it.
The Charging and Resting Protocol
With a properly chilled base in hand, it’s time to load the whipper. A common rookie mistake is overfilling. Never go past the maximum fill line—on a 1-litre dispenser, that's usually around the 900ml mark. If you overfill it, the gas has no room to circulate, and you’ll get a dense, poorly aerated mousse and a lower yield.
The charging process itself isn’t just about screwing on a cartridge. It’s about precision.
- For a 0.5-litre dispenser, you’ll need one 8g N₂O charge.
- For a 1-litre dispenser, you’ll need two 8g N₂O charges.
When using larger cylinders, you gain more control but must be careful not to over-gas the mixture. A quick 1-2 second burst of gas is a good rule of thumb for a single charge equivalent. Bar managers have switched to these systems for their reliability. You can find more on why so many pros now use these kinds of cream chargers in their bars.
After each charge, you need to shake the dispenser—and shake it hard. Hold it horizontally and give it 15-20 seconds of vigorous agitation. This is what forces the nitrous oxide to dissolve into the fat, creating that stable foam.
Finally, the step everyone seems to forget: resting. After the final shake, the charged dispenser goes straight back into the fridge for at least 20-30 minutes. This rest period lets the gas fully integrate and allows the mousse to stabilise into its final structure. Skipping this is why so many mousses look great for the first minute, then collapse. This is the exact protocol top-tier catering crews use to produce thousands of identical portions. It’s all about the process.
Scaling Production and Maximising Shelf Life
Making one perfect mousse de coco is the art. Being able to serve five hundred of them flawlessly during a hectic Saturday night service? That’s pure operational science. For any serious bar or catering outfit in Fuerteventura and Lanzarote, this is where you stop being just a creative and start being a business that protects its margins.
I've seen so many teams get bogged down by the small details. Imagine prepping for a 200-person wedding. Instead of fumbling with dozens of small whippers, the smart move is to batch a large volume—let's say 10 litres of the base mixture—and then systematically fill and charge your 1-litre dispensers as you go. This batching strategy is your guarantee of absolute consistency, from the first serving to the last.
Calculating Your Yield for High-Volume Service
Guesswork is the enemy of profit. You need to know exactly what your output is to manage inventory and control costs. This is where your choice of N₂O cylinder completely changes your workflow. Forget the small 8g cartridges; for any commercial operation, they’re a frustratingly inefficient and expensive habit. Moving to larger cylinders isn't just an upgrade; it’s a fundamental shift in how you run your service.
Here’s a practical breakdown for a professional setting:
| N₂O Cylinder Size | Approx. Yield (8g Charges) | Best For |
|---|---|---|
| 580g / 670g | 70 - 83 Charges | Mid-volume bars, smaller catering events, or as a reliable backup. |
| 2.0kg (2000g) | ~250 Charges | High-volume nightclubs, large-scale catering, and busy hotel restaurants. |
Think about it this way: a single 2.0kg Fastgas cylinder gives you the firepower of roughly 250 of those fiddly 8g charges. If your 1-litre whipper needs two charges, that one cylinder lets you prep 125 full dispensers of mousse de coco. That’s a massive reduction in changeover time during a busy rush and it makes managing your stock so much simpler. If you want to really run the numbers, our guide on 580g vs 2kg N₂O cylinders has a full cost-benefit analysis.
Storage Protocols and Shelf Life
Getting your storage right is non-negotiable. It’s about both safety and quality. Your uncharged mousse base is flexible; you can prep it ahead of time and keep it in an airtight container in the coldest part of your fridge for up to 3 days. This is a huge advantage for managing prep schedules.
Once it's charged, however, the rules get stricter.
A correctly charged dispenser of mousse de coco, kept consistently refrigerated below 4°C, will remain stable and safe for service for up to 5-7 days. This isn’t magic—it’s the pressurised, sealed environment inside the whipper actively inhibiting bacterial growth.
To meet AESAN health standards, every single charged dispenser needs a clear label with the prep date and time. A strict FIFO (First-In, First-Out) system isn't just a recommendation; for a professional kitchen, it's essential for compliance and for preventing waste. It ensures the serving you make on day five has the same perfect texture and flavour as the one you made on day one.
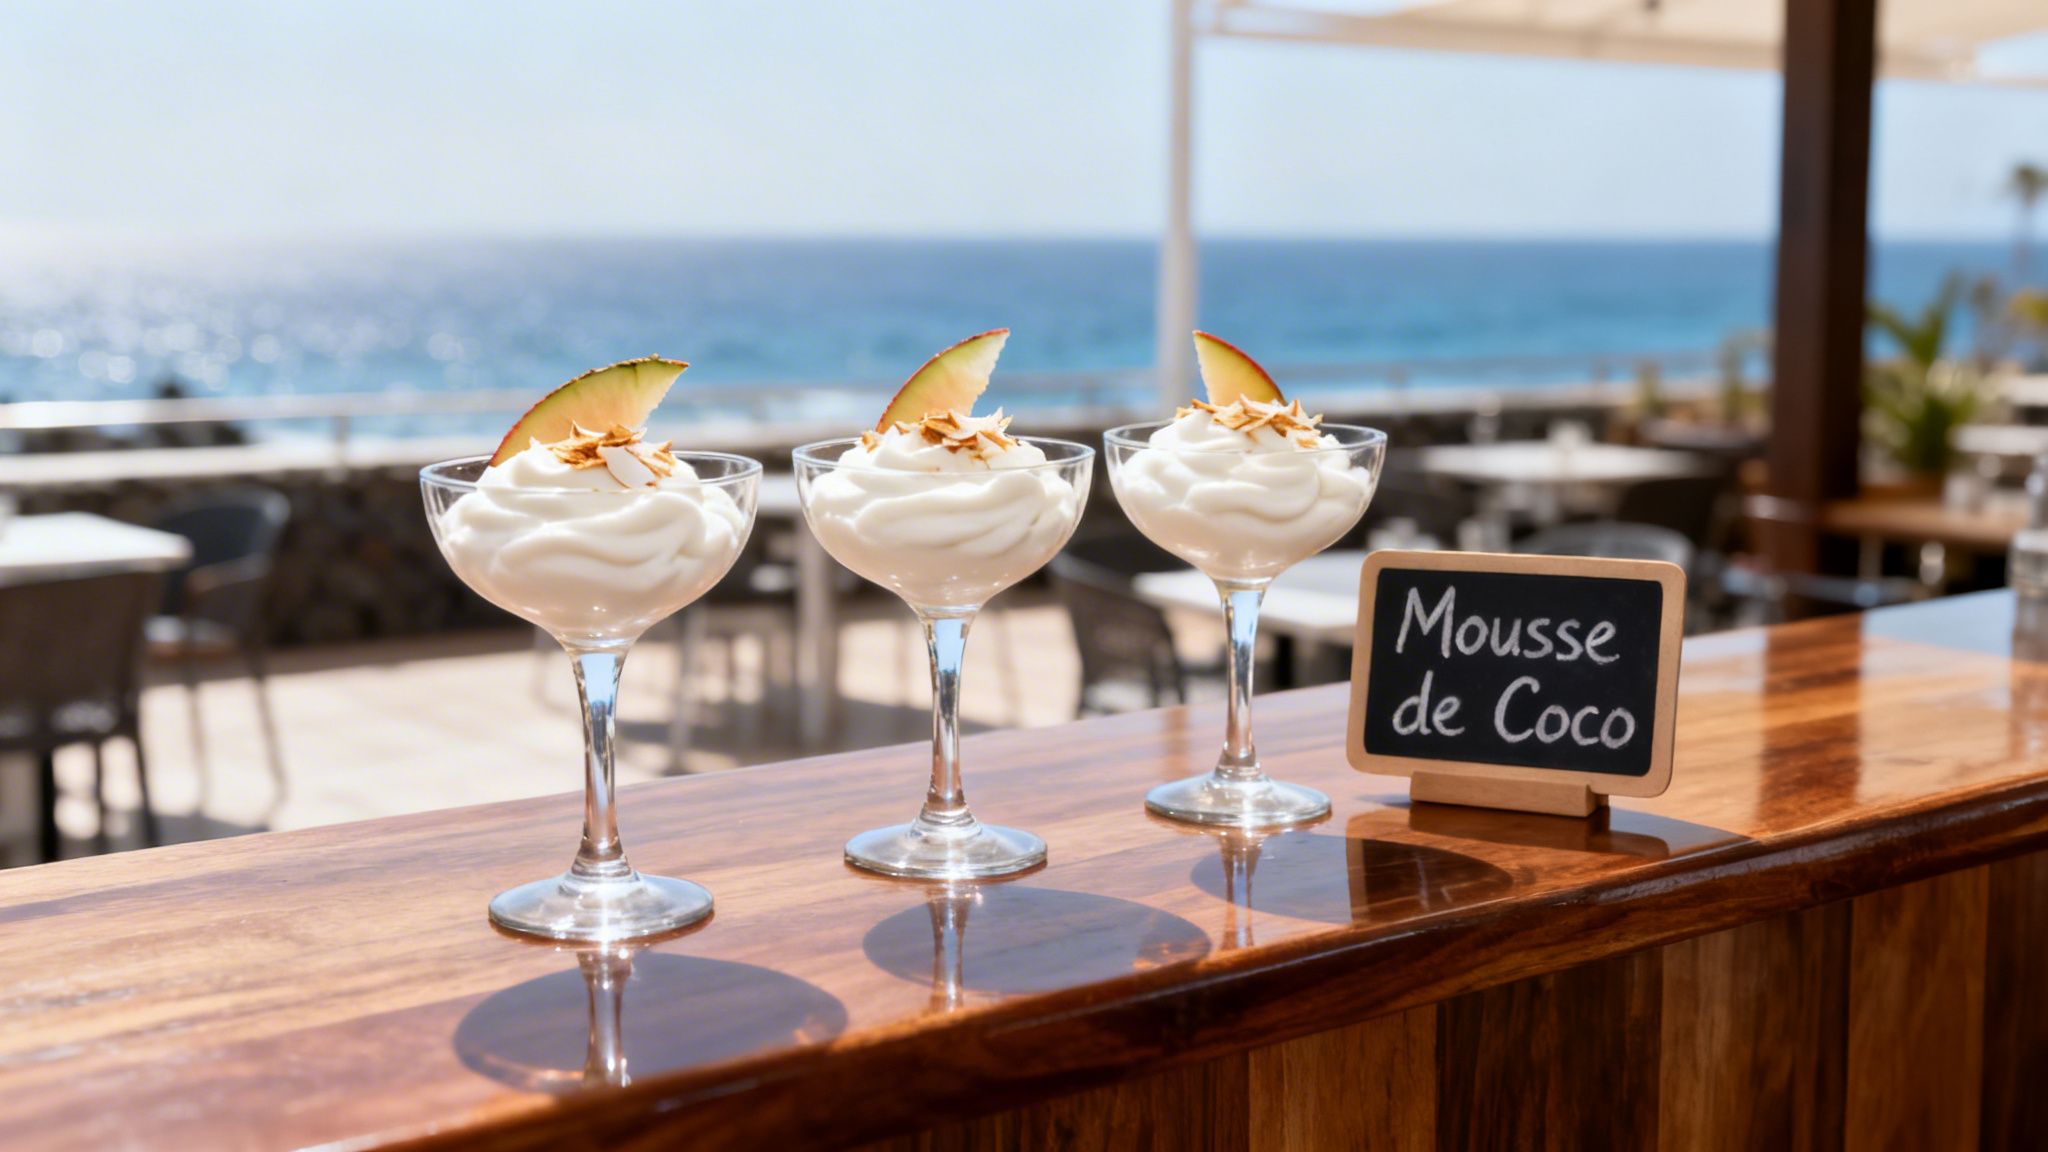
Creative Serving Ideas and Cocktail Pairings
You’ve made and chilled the perfect mousse. Now comes the fun part—and the most profitable one: the presentation. This is where you move beyond just serving a dessert and start creating a signature experience that gets people talking. It’s how you justify a premium price point, whether you're running a busy resort in Playa de las Américas or a chic cocktail spot in Las Palmas.
Your dispenser nozzles are your best friend here. Don't just settle for the standard tip; swapping out the nozzle is the quickest way to unlock a huge range of visual styles and elevate your plating game instantly.
- Tulip or Star Tip: This is your classic go-to for elegant rosettes. A simple swirl on top of a brownie or as a garnish on a cake slice looks clean, professional, and instantly adds a touch of class.
- Straight Tip: I use this for more modern, minimalist presentations. It’s perfect for layering mousse in shot glasses with a fruit purée or creating a clean, quenelle-like shape on a plate without the fuss.
- Forked or Ruffle Tip: When you want high drama and texture, this is the one. A single, impressive ruffle of mousse de coco across a dark chocolate tart creates a visual that looks incredibly technical but takes seconds to pull off.
Infusing Canarian Flavours
To really make this dessert your own and connect with the local palate, you need to weave in flavours that are unmistakably Canarian. This is what turns a simple coconut mousse into a unique island creation people will remember.
Try a light dusting of toasted gofio. It adds a nutty, earthy depth that beautifully cuts through the richness of the coconut. For a sweeter, more complex note, a delicate drizzle of ron miel (honey rum) not only adds incredible flavour but also gives it a gorgeous amber shine. Of course, topping with fresh, diced tropical fruits like mango, papaya, or local Canarian bananas provides a bright, acidic contrast that makes the whole thing pop.
Forget complicated dessert prep. With a charged dispenser ready to go, you can add these high-value touches à la minute. It’s all about creating a premium, customised dessert in seconds, right at the point of service.
Crafting Signature Cocktail Experiences
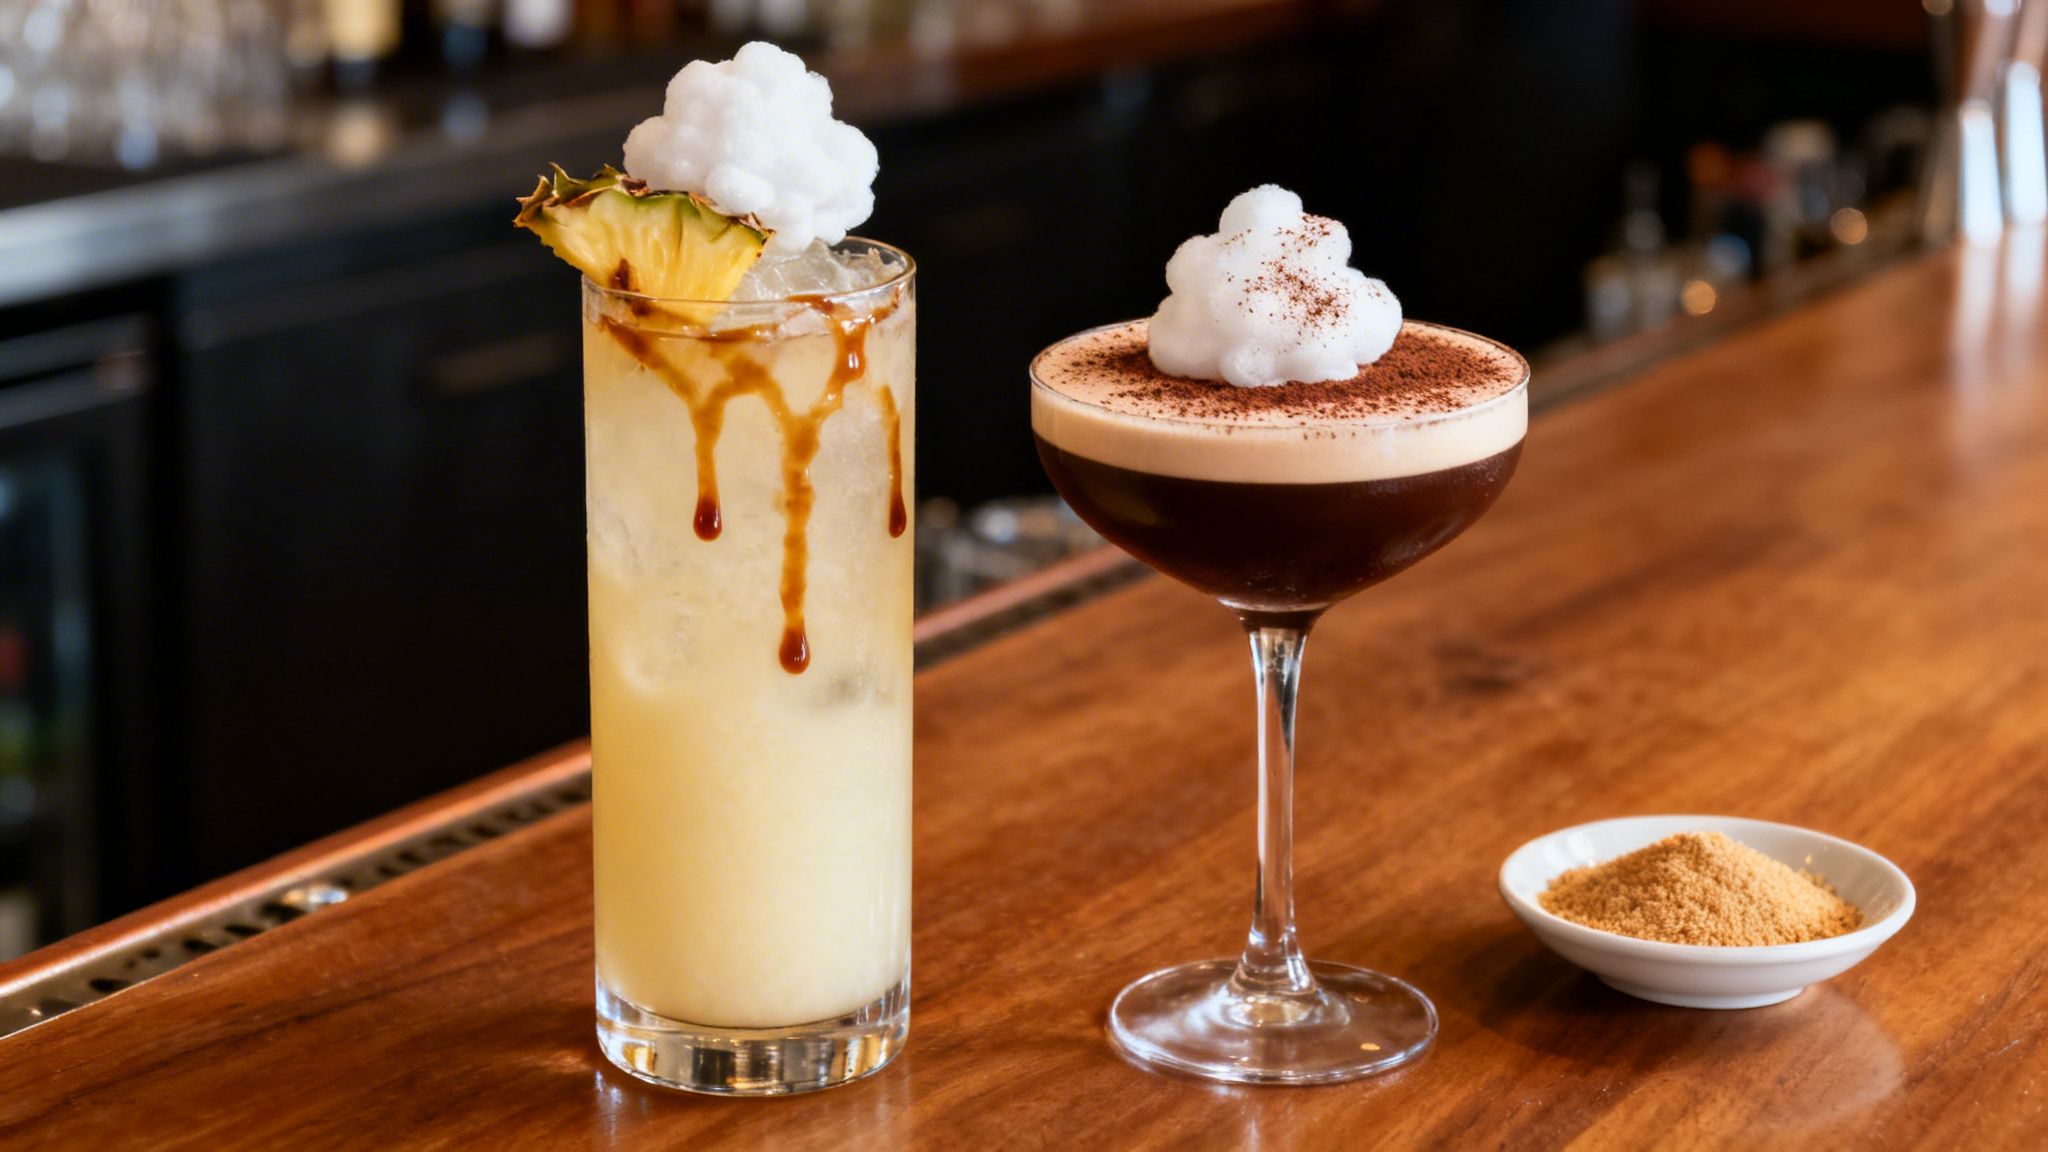
The bar is where your mousse de coco becomes a true profit centre. Using it as a cocktail component opens up an entirely new menu category and a serious point of difference.
A dense, stable foam makes an incredible float. I’ve had huge success with it on an espresso martini, where the coconut foam slowly melts into the rich coffee below. It also completely transforms a piña colada, adding a luxurious, silky texture that feels far more sophisticated than just blended ice.
If you really want to create something special, think about using flavour-infused N₂O gas. Options like the strawberry or watermelon from Miami Magic let you create a uniquely flavoured mousse de coco foam. Imagine a strawberry-coconut foam topping a rum punch. These are the details that build a reputation and create cocktails people will cross town for.
Frequently Asked Questions (FAQ)
1. Why is my Mousse de Coco runny?
This is almost always caused by one of three things:
- Low Fat Content: Your coconut cream must have at least 20-22% fat. Anything less will result in a soupy mess because the gas has nothing to bind to.
- Temperature: The mousse base must be chilled below 4°C before you charge it. A warm base will not whip correctly.
- Improper Shaking: After charging, shake the dispenser vigorously for 15-20 seconds to fully dissolve the N₂O into the liquid.
2. How can I make a vegan Mousse de Coco?
The base recipe is naturally vegan since it uses coconut cream. The only modification needed is your stabiliser. Swap out gelatine for a plant-based option like agar-agar. Remember that agar-agar needs to be boiled to activate, so adjust your preparation method accordingly.
3. How long does Mousse de Coco last?
An uncharged base can be stored in an airtight container in the fridge for up to 3 days. Once charged, a properly refrigerated dispenser will keep the mousse fresh and stable for 5-7 days. For food safety and AESAN compliance, always label each dispenser with the preparation date and use a First-In, First-Out (FIFO) system.
4. What is the best way to scale production for a large event?
Switch from small 8g cartridges to a large-format N₂O cylinder (like a 2.0kg tank). Prepare your mousse base in a large batch (e.g., 10 litres), then fill and charge your 1-litre dispensers as needed. This ensures consistency and is far more time- and cost-effective for high-volume service.
5. Why should I use a local B2B supplier in the Canaries?
Partnering with an on-island B2B supplier like Kings Canisters ensures you receive AESAN-compliant, food-grade E942 gas without customs delays or supply chain issues. They understand local regulations, provide correct IGIC invoicing, and offer reliable delivery across Tenerife, Gran Canaria, Lanzarote, and Fuerteventura, which is critical for business continuity.
For a reliable, island-wide supply of certified food-grade N₂O cylinders and dispensers, Kings Canisters is the trusted B2B partner for hospitality professionals across the Canaries. Ensure every mousse and foam is perfect by visiting https://www.kingscanisters.com.